3D Layered Easter Egg
Spring is a season defined by renewal, vibrant colors, and the joy of celebration. For crafters, decorators, and DIY enthusiasts, this time of year offers a unique opportunity to create meaningful home decor that stands out from mass-produced items. One of the most striking ways to capture the spirit of the holiday is through the use of a 3D Layered Easter Egg. This design transforms a simple concept into a stunning visual centerpiece, offering depth, texture, and a personalized touch that standard flat decorations simply cannot match. Whether you are looking for a thoughtful gift, a unique way to dress up your living space, or a special sign to mark the occasion, this digital design provides the perfect foundation for your creative projects.
Understanding the Design Concept
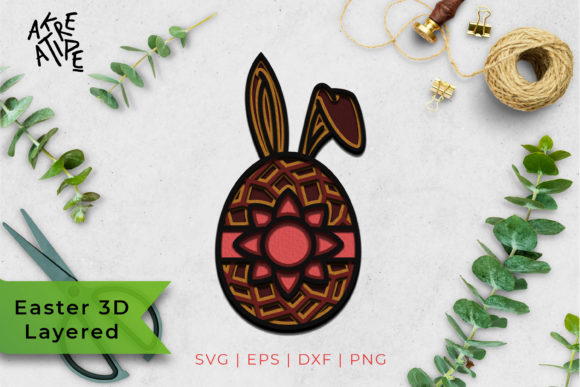
A 3D Layered Easter Egg is not just a single image; it is a multi-dimensional composition created by stacking multiple cut pieces on top of one another. The result is an illusion of depth that makes the egg appear to float or emerge from the background. This technique allows for intricate detailing, as each layer can feature different patterns, textures, or color gradients. While the screen display may show specific color combinations as an example, the true beauty of this design lies in its versatility. You have the freedom to customize the colors to match your specific theme, interior design palette, or personal preference. This adaptability ensures that the final product feels bespoke and tailored to your exact needs.
Material Selection and Cutting Tips
To achieve the best results with your 3D Layered Easter Egg, selecting the right materials is crucial. The thickness and rigidity of your chosen medium will directly impact the structural integrity and visual appeal of the final piece. Here are some recommended materials based on common crafting practices:
- Cardstock (65lb): This is an excellent choice for beginners or those creating smaller decorative pieces. It holds crisp edges well and is easy to handle. However, be mindful of the weight if you plan to stack many layers.
- Plywood and MDF: For a more permanent, rustic, or farmhouse-style decoration, wood is an ideal option. Plywood offers natural grain patterns that add warmth, while MDF provides a smooth, uniform surface that takes paint beautifully. These materials are perfect for large wall hangings or outdoor signs.
- Acrylic: If you want a modern, sleek look, acrylic sheets can create a stunning glass-like effect. They reflect light nicely and offer a premium feel, though they require specific blades and settings on cutting machines.
- Paper and Cardboard: For quick prototypes or lightweight mobiles, standard paper or cardboard works well. Cardboard adds a bit more stiffness than regular paper, making it easier to maintain the 3D structure without collapsing.
When working with these materials, especially cardstock, ensure that your adhesive mat has not lost its tackiness. A weak grip can cause the material to lift during the cutting process, leading to tears or misaligned cuts. Additionally, using an intricate setting on your cutter is highly recommended. Because the design features a lot of detail, a higher precision setting ensures that even the smallest elements are cut cleanly, preserving the delicate nature of the layered effect.
Software Compatibility and File Formats
One of the greatest advantages of purchasing a digital design set is the flexibility it offers across different software platforms. The provided file set is designed to be compatible with a wide range of tools, ensuring that regardless of your preferred equipment, you can bring this design to life.
For users of Silhouette Studio, the set includes both DXF and SVG formats. The DXF file is suitable for the Basic Free Edition, allowing entry-level users to access the design without additional software costs. Meanwhile, the SVG file is optimized for the Designer Paid Edition, unlocking advanced features and editing capabilities. Cricut Design Space users will find the SVG format fully compatible, ensuring seamless integration into their workflow. Other popular software programs like Make the Cut, Sure Cuts A Lot, and Brother Scan N Cut also support these formats, making the design accessible to a broad community of crafters.
For professional designers or those who prefer vector editing software such as Adobe Illustrator, Corel Draw, or Inkscape, the EPS file is included. This format preserves the vector data, allowing for precise scaling and modification without loss of quality. Additionally, PNG files are provided for printing purposes or for use in other software programs that do not support vector formats. This comprehensive approach ensures that every user, from hobbyist to professional, has the tools necessary to succeed.
Practical Applications and Creative Ideas
The applications for a 3D Layered Easter Egg extend far beyond traditional holiday decorating. Its versatile nature allows it to serve multiple functions in your home and gifts. As a Gift, it offers a personal and heartfelt gesture. You can customize the colors to match the recipient’s favorite shades or incorporate their initials into the design. Packaging it in a clear box with tissue paper creates a charming present that shows effort and creativity.
As Home Decorations, these eggs can be arranged in clusters on a mantel, hung as mobile art, or placed on dining tables as centerpieces. The 3D aspect adds visual interest to any room, drawing the eye and adding a sense of dimensionality to flat surfaces. For a more rustic vibe, consider using stained wood for a warm, earthy tone, or opt for pastel cardstocks for a soft, springtime aesthetic.
It also serves as an effective Sign for the Special Day. By combining the egg design with text layers, you can create welcoming messages for guests. The layered effect gives the text a dynamic presence, making it stand out against walls or doors. This is particularly useful for parties or family gatherings where you want to set a festive mood immediately upon entry.
Implementation Considerations
When preparing your print job, especially if you intend to use iron-on transfer paper for fabric applications, remember to follow the specific directions provided by the transfer paper manufacturer. A critical step often overlooked is clicking the “flip horizontal” button before finalizing your print. This mirroring process ensures that when you apply the transfer, the design appears correctly oriented on the final product. Neglecting this step can result in reversed text or asymmetrical designs, which can be difficult to correct after the fact.
Furthermore, please note that this listing contains a digital product only. The package includes an SVG, EPS, DXF for hand-cutters, and a PNG of each layered file, all contained within a single zipped file. No physical items will be sent to you. This digital-only model allows for instant access and unlimited printing, empowering you to create as many variations as you desire without worrying about inventory or shipping delays.
Conclusion
Incorporating a 3D Layered Easter Egg into your spring celebrations is a fantastic way to blend tradition with modern crafting techniques. By leveraging the right materials, software, and creative vision, you can produce decorations that are not only visually appealing but also deeply personal. Whether you are a seasoned pro or just starting your crafting journey, this design offers the flexibility and detail needed to create something truly special. Embrace the potential of digital crafting, experiment with colors and textures, and enjoy the rewarding process of bringing this beautiful design to life.